Creating CI/CD Pipelines in Azure DevOps


Continuous Integration (CI)/Continuous Delivery (CD) pipelines will allow us to deploy a new version of software through a path of building, testing, and deploying code. It introduces automation and continuous monitoring throughout the lifecycle of a software product, from integration and testing to delivery and deployment.
Continuous Integration (CI) is the process of automating code changes that can happen through developing, testing or merging the code to a shared repository for an application.
Continuous Delivery (CD) helps us to deploy the artifacts into different environments. We can create an automated test case for an application to ensure that the application is deployed successfully to a cloud environment. CD allows us to deploy the code to a different stage by authorized approvals.
Architecture

How to Build Pipelines?
Let's create three app services for three environments-dev, staging and production in the Azure portal. Now got to the azure DevOps portal https://dev.azure.com and create a new organization to maintain the projects. Here the pipeline comes into the picture. This is where you will create various tasks like compiling code, bringing in dependencies, and more. You can create a new pipeline by using a YAML file or basic template from the portal itself. You will then be prompted to where your code is stored. In this project, the code is stored in a GitHub repository, where triggers for invoking the build will come from. Here you can add multiple tasks and also add the tools needed to build the artifact.
Steps to Create Build Pipeline
Login to your Azure DevOps portal and then select the organization and go to your project
Go to Pipelines, and then select new pipeline
Add your GitHub repository
Azure Pipelines will analyze your repository and recommend the pipeline template
Now you can add jobs according to the runtime environment by using a template or YAML file. If you want to watch your pipeline in action, select the build job
Specify the location to publish the artifacts

How the Azure Pipelines Invoked?
The pipeline will be triggered when the new commit is made to the GIT branch. You can run the pipeline manually. Once the trigger is made to the pipeline, it will start the build process. The build pipeline will return information in real time as each job and task in the pipeline runs.
It shows all the logs while processing the jobs and tasks so that you can identify the causes if the pipeline fails.
How to Create a Release Pipeline?
A release pipeline will take the build artifact that was created by the build pipeline. It will invoke the build process and deploys that to one or more environments. In this project, you’re going to use a release pipeline to publish code in the GitHub repo to an Azure Web App. Once the build process was done successfully, you have an artifact created by the pipeline. The artifacts need to be added to the release pipeline, such that it can deploy the code to the azure web app with respective environments.
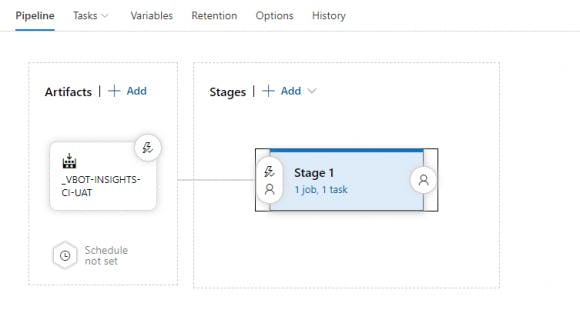
Adding stages and approvals to deploy the app
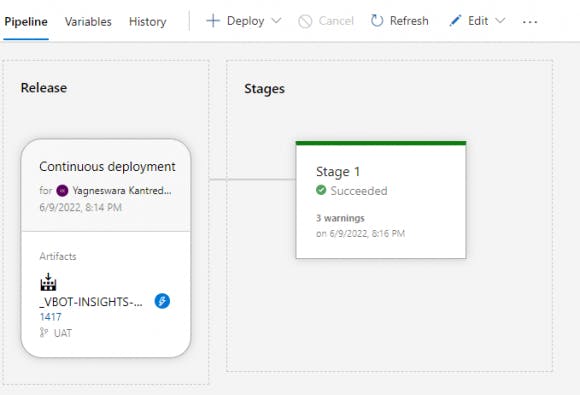
On successful completion of the release pipeline
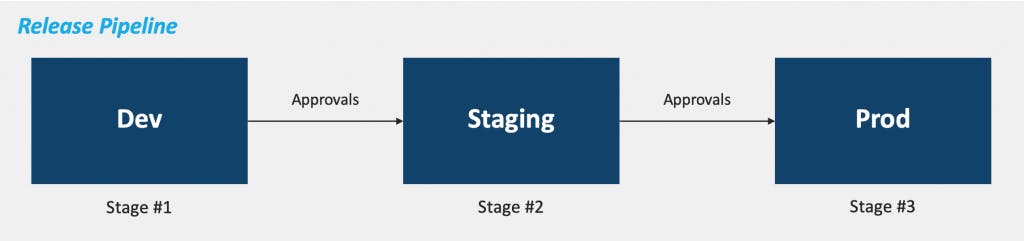
Deploying the Code to Different Stages
We can have multiple stages in a single release. Let’s see how to release the code to different stages. Let’s assume we have three different stages Dev, Staging, and Prod respectively. Let’s add pre and post-deployment conditions for all the stages. Once the build pipeline was published, the artifacts and the release pipeline get triggered and ask for approval to deploy the code to stage 1 i.e., Dev. When the release is completed in stage 1, it is ready to move to stage 2 i.e. staging. Again we can have approvals to make sure it is running perfectly. So, in the same way, we can do deployments to different stages.
Conclusion
Azure DevOps is a powerful tool that helps enterprises to plan smarter, collaborate faster, and deliver better within the set of dev services. The Azure CI/CD pipelines offer a quick, easy way to automate building your projects. It supports any language or platform, deploys to different target environments, integrates with GitHub, and is compatible with Windows, Linux, and Mac.